Showing posts with label Crafts. Show all posts

April 2, 2015

5 Fun Easter Crafts and Activities Your Kids Will Love

Today we have a guest post for Easter Crafts for Kids! Corinne Jacob contacted me an asked if she could write a post sharing these crafts! I was so excited to see what she came up with and can't wait to try a few with my own kids!

Now on to her post!


The days leading up to Easter are always fun. They are mostly spent planning Easter meals, engaging kids in exciting Easter activities and chalking up guest lists with your partner. While everything can be done in peace when you're back home from work, managing the kids while you’re planning the festivities sounds like an uphill task, doesn't it? Here are 5 Easter crafts and activities that the kids will gleefully take part in while you can get down to your Easter planning.

The Countdown Eggs

This is an excellent Easter activity to get kids on their toes. You will need a dozen Easter eggs, Easter grass, an egg carton with 12 holders, a black marker with nontoxic ink, candies, and 12 quick activities. You can use these activities if your hands are full with Easter planning and you don’t have time to come up with unique ideas for the activities!

  1. Memorize an Easter poem and say it at dinnertime
  2. Draw paisleys on an Easter egg.
  3. Help Mama bake the Easter cake.
  4. Make fresh fruit juices for the family because they are tired from Easter planning.
  5. Solve an Easter worksheet online.
  6. Complete an Easter craft.
  7. Clean your room.
  8. Learn to make a simple Easter dish for the family.
  9. Write a short journal on the history and traditions of Easter. Support your journal with pictures.
  10. Learn how to create a “blow out egg”.
  11. Make paper bags to give out Easter gifts in them.
  12. Solve an Easter puzzle.

Stuff the egg carton with Easter grass. Write the numbers 1-12 on the 12 Easter eggs. Stuff each egg with candies and a strip of paper that will have an activity. Invite the kids to crack open an egg very day, beginning on the 12th day leading up to Easter. The surprise candies and the ‘Easter Activity of the Day’ inside each Easter egg is sure to keep the little ones both excited and busy, at least for as many hours as it takes to finish the activity! Don’t be surprised if your kids start waking up early as they look forward to cracking open an egg every morning to discover the goodies inside.

Tea Cup from Easter Eggs

Don’t you find it quite a waste when you throw away those colorful, plastic Easter egg halves? Involve kids in this Easter craft and get new set of plastic tea cups ready for the next tea party at home with those throwaway plastic halves. You will need the pointy Easter egg halves and not the rounder ones for this craft. You will also need a hot glue gun, large buttons, ribbons, rhinestones, glitter, paints, and the likes.

Help the kids glue a button to the bottom of each half to make it stable. Please use the hot glue gun carefully with children around. Soon after the glue sets in, start decorating the cups. You can line the rim with ribbons, doodle with paints, glue rhinestones, and sprinkle glitter on the outside of the cups to bring them alive. Not only will you have a new set of tea cups ready in no time, but you will also have a busy child feeling contented at her work of art at the end of it!

Easter Garland

If you’re looking to do up your spacious living room with a splash of colors this Easter, then here is a great idea. Get the kids to cut out eggs from color cards (easily available at hardware stores) and string them together to form a string of colorful Easter eggs. Simple but fun, this activity will also sharpen the kids’ hand-eye coordination. First, use a template to cut out an egg from a piece of cardboard. Then, trace the egg at the back of each card making sure the white line on the color card is in the center. Invite the kids to cut out the eggs from the cards. Punch two holes near the pointy top of the egg and have the kids string waxed cotton through the holes to hold the color card eggs together. Your Easter garland is ready to cheer up your mantelpiece, chest of drawers, the ceiling or the doorway!

Easter Egg Photo Frame

It’s time you put those colorful Easter eggshells into good use and involve the kids in this process. You will need those eggs which you've already blown dry and colored their shells. Crumble up the shells in a bowl and mix them to get a lovely assortment of pastel colored eggshells. Take a photo frame that has a plain and simple border. Apply glue onto the frame, take a piece of eggshell and help the kids press it firmly onto the frame. Don’t fret if the shell cracks; the mosaic look is quite desired. Besides, the kids would love the sound of eggshells cracking beneath their fingers!  Continue to add shells on the glue till the whole frame is filled with them. Wait till they dry before you can use the photo frame.

Paper Tube Egg Holders


How cute do the pastel-shaded Easter eggs look when placed on equally cute holders? Make some of these egg holders from empty toilet paper tubes with the kids. You will need empty toilet paper tubes, acrylic paints, buttons, stapler, ribbons, glue, and other decorations you like to make these holders in a jiffy. Use a knife to cut the tube into two halves. Hand over both the halves to the kids to paint them. Help the kids to cut out ears from one half of the tube. Use glue to glue on the ears on the inside of the other half. Ask the kids to add buttons for the bunny eyes and a bow, made from ribbons, for the bunny mouth. Feel free to use markers to draw whiskers and eyelashes. Stuff the holders with Easter grass and place the eggs on them. The holders are ready in no time!

I hope you find these ideas useful. I’d love to hear your feedback and ideas on other Easter crafts that my little ones would enjoy.

Author Bio:

Corinne Jacob is a wannabe writer who is convinced that kids learn best when they’re having fun. She is constantly on the lookout for new and exciting ways to make learning an enjoyable experience. Corinne loves all things that scream out un-schooling, alternative education and holistic learning.


August 12, 2013

Office Update

I haven't posted in a couple weeks as I was pretty much having to lay down as I threw my back out pretty bad. It started feeling better last Friday. So this weekend I have been super busy getting back to my office remodel!

Just a few sneak peeks of my projects I have started.

I cleaned out the closet. It went from all of this stuff


to this nice cleaned out closet. Will show finished results soon!

I re-purposed this frame.


And bought my first roll of washi tape!!! I am now and addict! And made these clothespins!


Check back soon for more Office updates and finished projects from above. 

August 15, 2012

School Supply Table Top Caddy

This is another thing I found on Pinterest and knew it was something I had to have in our school room. I like that it keeps all the important supplies within arms reach.

What you need:

1 Lazy Susan

4 or more tin buckets (check Target’s dollar spot)

Screws or Magnets to hold the tin buckets down.

And a drill or a handy man to help


My Lazy Susan that we bought was brown and would not go with our school room so first up I painted it with primer and white spray paint.

Once dry I place my tin buckets on to get an idea on how many would fit and placement so my husband could screw them on.

photo 1 (3)

Once I had them where I wanted them my husband screwed them into place. (note: make sure your screws aren’t to long because they will go through all the way. Trust me.)

photo 2 (2)

Once that is done add your supplies and give it a spin. Just not too hard as you don’t want crayons and markers everywhere!

photo

Can’t wait to see what Dylan thinks of this being on our table and so easy for him to access the supplies he needs so easily.

Do you have one of these? If so share! I love seeing what others do to spiff things up!

August 7, 2012

Toolbox Makeover

I am sure those of you who are on Pinterest have seen these toolbox makeovers before. I saw them and knew it was something that would help me stay organized and keep the little things in places where I could find them. 

I headed to Lowes for a toolbox. This is what mine looked like before (sorry I didn't get a better before picture)
Stack-On 22-Drawer Storage Cabinet
Grabbed a can of primer spray paint and white glossy paint as I wanted to to go well with our classroom.
When I got home I spray painted the base of the tool box with the primer and then once it was dry sprayed the white paint on it. 

While I was waiting on it to dry I had laid my drawers out in order to how they were in the box. This way I could lay out what papers I was going to use. You will need scrapbook paper or fabric of your choice to line the drawers. 
I traced the back part of the drawer on the paper and it fit perfectly on the inside. 

Then I mod podge them in. I suggest taping them though as it was a bit difficult and if I could go back that is what I would have done. 

Once the base is dry place the drawers inside. 

Then it is time to label the drawers. Which I haven't finished as I am not sure what all I am placing in there yet.
I used scrapbook stickers on the outside of the drawer for labeling. 

Have you made one of these? If so share a link in the comments. I would love to see it! 

July 19, 2012

Muffin Tin Crayons

Who doesn't like to turn something old into something new, fun, and exciting?

What you need:
  • Crayons
  • Muffin tin or any tin you want that can be placed in the oven. (mine did not come fully clean so beware)
  • Oven set at 250* F


First you have to peel the paper off the crayons you are using. I used old crayons that the boys didn't really like to color with anymore. 


Next we added our crayons to our muffin tin (any type of tin you want to use). Fill each cup about half way.


Once they are filled. Place in the oven for 8 to 10 minutes until all of the crayons are melted.
After they have cooled they will look like this! I had to bang the tray on the counter a couple times but they popped right out!

Let cool and have fun coloring!


How are you spending your Summer? Have any fun activities or crafts that you are doing? Share in the Comments if you have blogged about them so we can all see! 


January 4, 2012

Felt Play Mat from Pinterest

I have to admit Pinterest is my little getaway. It is the place I turn to whenever I have free time. I have so many ideas from there I could probably do one a day for a couple years. I don't even pin them all because I know I can't do them all. Nor would my husband want all my crafts filling our home. Anyways enough rambling, I found this felt play mat a few weeks ago and the blog it was from said that you can use a glue gun and that it would hold up. I looked in my closet and I had felt and a glue gun with plenty of glue sticks. So I got busy during the boys nap time and created this!


My boys absolutely love it and have played with it every day! I may even make another for just play animals.

Credit for idea: A Girl and a Glue Gun 

So who else is addicted to Pinterest?
If so leave me your link so I can follow your pinterest page!


April 20, 2011

Homemade Easter Bunny Ears Craft

Since Easter is just around the corner I figured I need to get a few crafts together this week just for fun. So today we made Easter Bunny Ears! 

We started with 2 strips of white paper for the strap around the head. We had 2 bunny ears and 2 pink insides of the bunny ear. The boys glue their ears together and then as they dried they colored there straps.

 Then when they finished coloring we stapled the ears to the straps.

Then measure your child's head so it fits and staple it closed.

And here is Austins finished bunny ears! Dylan is not into posing anymore for the camera so that is why he is not in the picture.

I will be back *hopefully* tomorrow with another craft that we started today but have to wait till tomorrow for it to dry!
Reason I say hopefully is I am having internet connection issues and that's another reason I haven't posted much it takes forever to upload pics right now. So hopefully in the next week or so I will have better internet!

March 16, 2011

St Patricks Day Rainbow Craft


What You'll Need
  • Black, Red, Yellow, Orange, Blue, Green Paper Scraps
  • Cottonballs
  • Paper Cut in the shape or a rainbow, cloud, and pot of gold.
  • Glue
1.  Start with the Pot of Gold. I put a line in the middle of our pot separating the top of the pot and where the Gold would be. 
2. Glue the Black scraps on the pot.
3. Then add the yellow at the top.


4. Next we did our Red Stripe. I only put glue down for one stripe at a time. Then proceed with the Orange,  Yellow, Blue and Green Stripes.


5. Add cottonballs to your Cloud Shape.
6. Let dry and then Staple the cloud and pot to the rainbow.

Have a Happy St. Patrick's Day tomorrow!

October 13, 2010

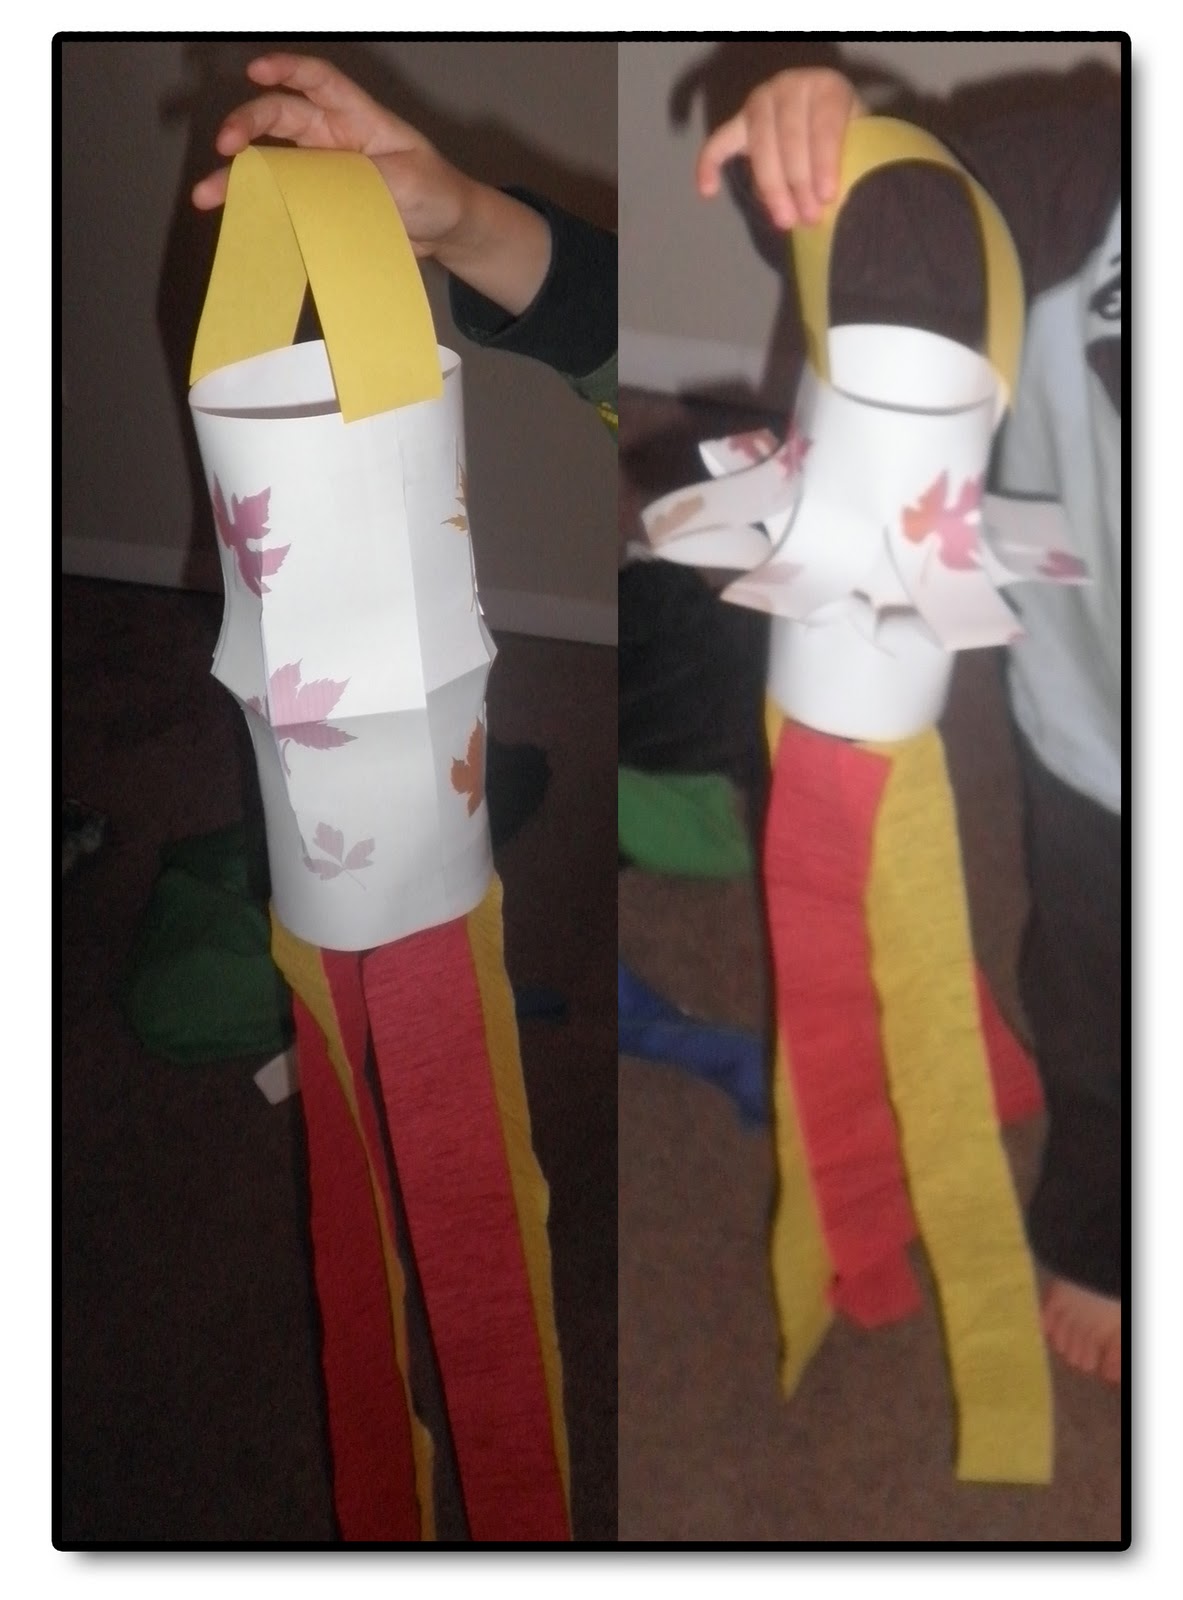
Fall Lantern- Cutting Practice


Do you like what you see and want to make one with your child? Need some cutting practice for your child but want it to be fun?

Here is the paper that we used for ours. Just click to download and print .
 
 
  1. To make these fold the paper long ways and cut on the lines then make a circle with the paper like shown in the picture and tape it together. 
  2. If you decide you want  yours to resemble the one on the right in the picture above all I did was tape it together on the inside.
  3. Add your streamers to the bottom ( I just used what I had at home)
  4. And add a loop of construction paper to the top
  5. And you are done with your Fall Lantern!
Enjoy!

October 11, 2010

Felt Food and Toys


Here is my pineapple slice that I finished this morning! I would've made more but I ran out of yellow. It wasn't as hard as I thought it was going to be it just took a bit to get the hang of.


Now Ive really gotten into this Felt Food thing! Here is what Ive made in the last week.

Pancakes with butter

Broccoli

Cauliflower

Pear

4 slice Pizza

And im so proud cause i made the patterns myself for my felt food!
Im really enjoying every aspect of making these! Dont mind my miscolored threads I bought what I could afford at the time and im managing with this for a while! I plan to start gathering different colored thread eventually!

 Felt Toy Aliens
I made these for my boys for Christmas as well! 
If youd like the pattern to make them yourself check it out HERE


If you are interested in making these I highly suggest checking out Susans blog at Chasing Marcus for great tutorials and join in on the linky as well!


October 1, 2010

Felt Food


 I have been following Chasing Marcus for a while now. And she has started showing tutorials for Sew... You think you can Felt Food? 

I decided I wanted to give it a try and once I bought my stuff had to go ahead and get started before she showed her tutorials! Im not very patient if you cant tell! 

So anyways I found a few patterns online and just figured I'd share what I've made so far! I plan to make a whole set of veggies and fruits and breakfast items for my boys for Christmas. 

I started with Fried Eggs. (Im going to make another set with a different stitch now that Susan from Chasing Marcus has shown a better way, and the blue edge will come off )


Then I tried a Carrot ( I made another the other night)


And last night I sat down to make some Strawberries. 


I wasn't to sure how into this I would get but in reality I love it! Its so relaxing to me and my kids get to benefit from it as well! Ill be back soon with some new pics as well of other items I've made!